Asp.net MVC系列教程8——完善登录功能

作者 Guanghui Wang 日期 2017-02-20
c#

简述

本文转自http://yuangang.cnblogs.com并加以整理。 今天我们来完善登录功能

索引

Asp.net MVC项目系列教程

项目开始

一、登录页面增加验证码

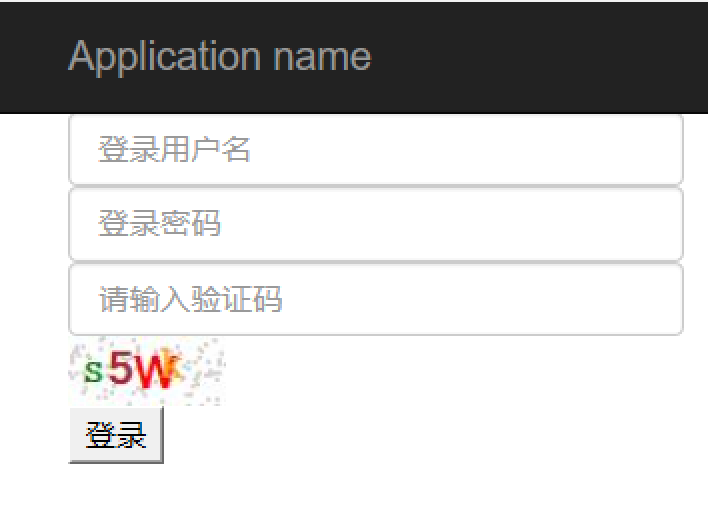
我们前面做了个简单的登录页,只有用户名和密码,现在我们增加一个验证码。

首先,原作者新建的验证码类verify_code.cs放在Models文件夹下面。我认为这个类放在Common类库要比Models要好,并且修改命名为Captcha。

知识小百科:全自动区分计算机和人类的公開图灵测试(英语:Completely Automated Public Turing test to tell Computers and Humans Apart,簡稱CAPTCHA),俗称验证码,是一种区分用户是计算机或人的公共全自动程序。在CAPTCHA测试中,作为服务器的计算机会自动生成一个问题由用户来解答。这个问题可以由计算机生成并评判,但是必须只有人类才能解答。由于计算机无法解答CAPTCHA的问题,所以回答出问题的用户就可以被认为是人类。

1
2
3
4
5
6
7
8
9
10
11
12
13
14
15
16
17
18
19
20
21
22
23
24
25
26
27
28
29
30
31
32
33
34
35
36
37
38
39
40
41
42
43
44
45
46
47
48
49
50
51
52
53
54
55
56
57
58
59
60
61
62
63
64
65
66
67
68
69
70
71
72
73
74
75
76
77
78
79
80
81
82
83
84
85
86
87
88
89
90
91
92
93
94
95
96
97
98
99
100
101
using System;
using System.Drawing;
using System.Drawing.Imaging;
using System.IO;

namespace Common
{
/// <summary>
/// 验证码构造类
/// </summary>
public class Captcha
{
/// <summary>
/// 该方法用于生成指定位数的随机数
/// </summary>
/// <param name="VcodeNum">参数是随机数的位数</param>
/// <returns>返回一个随机数字符串</returns>
private string RndNum(int VcodeNum)
{
//验证码可以显示的字符集合
string Vchar = "0,1,2,3,4,5,6,7,8,9,a,b,c,d,e,f,g,h,i,j,k,l,m,n,p" +
",q,r,s,t,u,v,w,x,y,z,A,B,C,D,E,F,G,H,I,J,K,L,M,N,P,P,Q" +
",R,S,T,U,V,W,X,Y,Z";
string[] VcArray = Vchar.Split(new Char[] { ',' });//拆分成数组
string VNum = "";//产生的随机数
int temp = -1;//记录上次随机数值,尽量避避免生产几个一样的随机数

Random rand = new Random();
//采用一个简单的算法以保证生成随机数的不同
for (int i = 1; i < VcodeNum + 1; i++)
{
if (temp != -1)
{
rand = new Random(i * temp * unchecked((int)DateTime.Now.Ticks));//初始化随机类
}
int t = rand.Next(61);//获取随机数
if (temp != -1 && temp == t)
{
return RndNum(VcodeNum);//如果获取的随机数重复,则递归调用
}
temp = t;//把本次产生的随机数记录起来
VNum += VcArray[t];//随机数的位数加一
}
return VNum;
}

/// <summary>
/// 该方法是将生成的随机数写入图像文件
/// </summary>
/// <param name="VNum">VNum是一个随机数</param>
public MemoryStream Create(out string VNum)
{
VNum = RndNum(4);
Bitmap Img = null;
Graphics g = null;
MemoryStream ms = null;
System.Random random = new Random();
//验证码颜色集合
Color[] c = { Color.Black, Color.Red, Color.DarkBlue, Color.Green, Color.Orange, Color.Brown, Color.DarkCyan, Color.Purple };
//验证码字体集合
string[] fonts = { "Verdana", "Microsoft Sans Serif", "Comic Sans MS", "Arial", "宋体" };


//定义图像的大小,生成图像的实例
Img = new Bitmap((int)VNum.Length * 18, 32);

g = Graphics.FromImage(Img);//从Img对象生成新的Graphics对象

g.Clear(Color.White);//背景设为白色

//在随机位置画背景点
for (int i = 0; i < 100; i++)
{
int x = random.Next(Img.Width);
int y = random.Next(Img.Height);
g.DrawRectangle(new Pen(Color.LightGray, 0), x, y, 1, 1);
}
//验证码绘制在g中
for (int i = 0; i < VNum.Length; i++)
{
int cindex = random.Next(7);//随机颜色索引值
int findex = random.Next(5);//随机字体索引值
Font f = new System.Drawing.Font(fonts[findex], 15, System.Drawing.FontStyle.Bold);//字体
Brush b = new System.Drawing.SolidBrush(c[cindex]);//颜色
int ii = 4;
if ((i + 1) % 2 == 0)//控制验证码不在同一高度
{
ii = 2;
}
g.DrawString(VNum.Substring(i, 1), f, b, 3 + (i * 12), ii);//绘制一个验证字符
}
ms = new MemoryStream();//生成内存流对象
Img.Save(ms, ImageFormat.Jpeg);//将此图像以Png图像文件的格式保存到流中

//回收资源
g.Dispose();
Img.Dispose();
return ms;
}
}
}

在AccountController.cs下面新建一个生成图片的二进制图片

1
2
3
4
5
6
7
8
9
10
11
/// <summary>
/// 验证码
/// </summary>
public FileContentResult ValidateCode()
{
string code = "";
System.IO.MemoryStream ms = new Captcha().Create(out code);
Session["gif"] = code;//验证码存储在Session中,供验证。
Response.ClearContent();//清空输出流
return File(ms.ToArray(), @"image/png");
}

然后在登录页面插入这个图片,放在登陆按钮之前。this.src+?是为了防止缓存,在点击图片是让浏览器发送新的请求,当然也有很多其他的方法,只要让每次url地址querystring不同就可以。

1
2
3
4
5
6
7
8
9
10
11
12
13
14
15
16
<div class="from-control">
@Html.TextBox("code", "",
new
{
@class = "form-control",
@placeholder = "请输入验证码",
@datatype = "*",
@nullmsg = "请输入验证码!",
@maxlength = 4,
@required = "required",
@autocomplete = "off"
})
<div class="code-img">
<img id="imgVerify" src="/Sys/Account/ValidateCode" alt="看不清?点击更换" onclick="this.src = this.src + '?'" style="vertical-align:middle;" />
</div>
</div>

带验证码的完整登录页面表单就好了。

二、增加验证码的功能

  1. 首先获取一下表单验证码string code = Request.Form["code"];
  2. 然后判断验证码图片是否过期,即 Session存储的验证码是否存在if (Session["gif"] != null)
  3. 在Session存储的验证码没有过期,即Session[“gif”] != null里面判断一下用户输入的验证码是否正确if (!string.IsNullOrEmpty(code) && code.ToLower() == Session["gif"].ToString().ToLower())
  4. 把登录验证方法放到用户验证码输入正确的方法体里面(如果用户输入的验证码不正确,就没有必要验证用户信息了)

    1
    2
    3
    4
    5
    6
    7
    8
    9
    10
    11
    12
    13
    14
    15
    16
    17
    18
    19
    20
    21
    22
    23
    24
    25
    26
    27
    28
    29
    30
    31
    32
    33
    34
    35
    36
    37
    38
    39
    40
    41
    42
    43
    44
    45
    46
    47
    48
    49
    50
    51
    52
    53
    54
    55
    56
    57
    /// <summary>
    /// 登录验证
    /// </summary>
    [ValidateAntiForgeryToken]
    public ActionResult Login(Domain.SYS_USER item)
    {
    var json = new JsonHelper() { Msg = "登录成功", Status = "n" };
    try
    {
    //获取表单验证码
    string code = Request.Form["code"];
    if (Session["gif"] != null)
    {
    if (!string.IsNullOrEmpty(code) && code.ToLower() == Session["gif"].ToString().ToLower())
    {
    //调用登录验证接口 返回用户实体类
    var user = UserManage.UserLogin(item.ACCOUNT.Trim(), item.PASSWORD.Trim());
    if (user != null)
    {
    //是否锁定
    if (user.ISCANLOGIN == 1)
    {
    json.Msg = "用户已锁定,禁止登录,请联系管理员进行解锁";
    log.Warn(Utils.GetIP(), item.ACCOUNT, Request.Url.ToString(), "Login", "系统登录,登录结果:" + json.Msg);
    return Json(json);
    }
    json.Status = "y";
    log.Info(Utils.GetIP(), item.ACCOUNT, Request.Url.ToString(), "Login", "系统登录,登录结果:" + json.Msg);

    }
    else
    {
    json.Msg = "用户名或密码不正确";
    log.Error(Utils.GetIP(), item.ACCOUNT, Request.Url.ToString(), "Login", "系统登录,登录结果:" + json.Msg);
    }

    }
    else
    {
    json.Msg = "验证码不正确";
    log.Error(Utils.GetIP(), item.ACCOUNT, Request.Url.ToString(), "Login", "系统登录,登录结果:" + json.Msg);
    }

    }
    else
    {
    json.Msg = "验证码已过期,请刷新验证码";
    log.Error(Utils.GetIP(), item.ACCOUNT, Request.Url.ToString(), "Login", "系统登录,登录结果:" + json.Msg);
    }
    }
    catch (Exception e)
    {
    json.Msg = e.Message;
    log.Error(Utils.GetIP(), item.ACCOUNT, Request.Url.ToString(), "Login", "系统登录,登录结果:" + json.Msg);
    }
    return Json(json, JsonRequestBehavior.AllowGet);
    }

三、修改验证方法

验证码没有过期且用户输入的验证码正确,这种情况下就应该验证用户信息了。

上一篇,我们验证用户信息真实的情况下,直接通过Json输出了Status=”y”,但是并没有存储用户信息。现在我们分两步来存储用户,首先通过Session存储,然后把用户非关键信息加密后写入Cookies,当Session过期的时候,通过Cookies重新获取用户并存储用户信息。这是大致的流程,很多朋友会说这也不是很安全,是的,软件是没有绝对的100%安全的,我们只能做到自己最好的安全。

  1. 在前一章用户类Account描述了用户的详细信息,包括部门、权限、岗位、角色等。在是否锁定那个if语句后面,我们开始写下面的代码。通过用户基础表来获取一下这些信息:

    var account = this.UserManage.GetAccountByUser(user);

  2. 写入当前用户到Session中

    1
    2
    //写入Session 当前登录用户
    SessionHelper.SetSession("CurrentUser", account);
  3. 记录用户ID、登录名、密码到Cookie

    1
    2
    3
    4
    //记录用户信息到Cookies
    string cookieValue = "{\"id\":\"" + account.Id + "\",\"username\":\"" + account.LogName + "\",\"password\":\"" + account.PassWord + "\",\"ToKen\":\"" + Session.SessionID + "\"}";

    CookieHelper.SetCookie("cookie_rememberme", new Common.CryptHelper.AESCrypt().Encrypt(cookieValue),null);
  4. 更新用户本次登录的IP

    1
    2
    3
    //更新用户本次登录IP
    user.LastLoginIP = Utils.GetIP();
    UserManage.Update(user);
  5. 如果验证成功,跳转到管理中心首页

    json.ReUrl = "/Sys/Home/Index";

这样,我们的登录就OK了。